null

Your Mini Cart

Onbuhimo Carriers

Onbuhimo Carriers

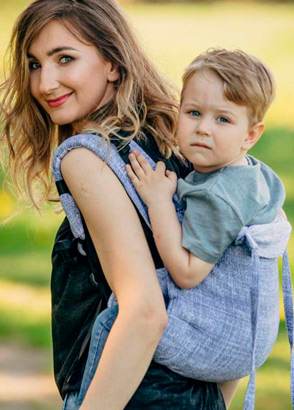
Based on a traditional Japanese way of carrying, the Onbuhimo has become an extremely popular type of baby carrier. With comfy shoulder straps but no waist band, Onbuhimo are ideal for during pregnancy or for those who prefer not to have a waist band.

Wearing an Onbuhimo is like giving a hands-free piggyback!


Why choose an Onbuhimo rather than a buckle carrier?

  • Ideal for pregnancy
  • No 'muffin top' or tummy rolls from a waist band squishing your middle
  • More compact than a regular buckle carrier to carry round with you.
  • Onbuhimo can be very reasonably priced.
  • Generally worn with a toddler who can help put it on by sitting on a chair or standing.


How different does it feel?

The weight is on your shoulders rather than spread between your waist or hips and shoulders.

For some people, an Onbuhimo is really comfy. For others it can put too much strain on their neck or shoulders.

It is important to get the adjustment right so it fits well - see tips below from Raising Ziggy.

Your child's legs go through the shoulder straps, rather than out the side of the back panel.


Brands

We currently stock the Lenny Lamb Onbuhimo's, however we look for new brands and styles all the time.


Putting on an Onbuhimo

The most common way to wear an Onbuhimo is on your back with a toddler. Some are described as only suitable for toddlers and back carrying, others don't give specific information.

Many can actually be worn on your front, but putting a baby into an Onbuhimo without the waist band can be pretty challenging! This is definitely a more advanced way to carry than a regular buckle carrier!

  • An Onbuhimo is worn high on your back, with your child's shoulders level with your shoulders.
  • Cinch the carrier before putting it on if you need to.
  • Back panel should be approx armpit height, as arms need to be out.
  • Arms are out the top.
  • Legs are through the shoulder straps.....this is the bit which feels weird when you are learning to put it on!
  • Tuck the seat fabric up under your child's bottom, between you both.


How to use an Onbuhimo

The following videos show you how to put on an Onbuhimo from a table or chair, the hip scoot from standing and the front carry.


Trouble-shooting Tips from Raising Ziggy - NZ's Onbuhimo guru!

  • Toddler high.
  • Arms out.
  • To tighten, lean forward so your toddler's weight is not heavy in the carrier (otherwise you squash instead of lift).
  • Or, place your hand under your toddler's bum, boost up and tighten the slack.
  • These tips will work for any brand of onbuhimo.
 
You can read more of Raising Ziggy's Babywearing Journey and excellent blog here. Our thanks for sharing your wonderful content.

Choosing an Onbuhimo

Points to consider.....

Budget - you can spend anything from about $100 to MUCH more.  
 
Looks  - you're more likely to use something you love! It's OK to choose the one you love the look of...and try it on for comfort.
 
Shoulder straps padding - this differs quite a bit so find out what you like.
 
Adjustability - how easy is it to get the straps right for you? Does it go big or small enough for you?
 

Cinch-ability - can you adjust the width of the seat to get the panel the right size for your child?

 
Leg padding - only some carriers have legs out padding. Is it a feature you need or does it not make a difference to you?
 
Fabric - Onbuhimo come in lots of fabrics like jacquard woven wrap fabric, cotton, linen etc.


Recommended Articles